Part of a Better IoT Thermostat
Summary

An Early Rendition HVAC Controller Block Diagram
My research has involved building a wifi-controlled HVAC (heating, ventilation, and air conditioning) controller with a web API. This facilitates the creation of a practical and affordable IoT thermostat.
Hardware: An ESP8266, 3 solid-state relays, power source, terminal blocks
Software: Arduino (C++)
Web API: AWS API Gateway, Lambda(Python), and DynamoDB
Background
I began working for Dr. Flanagan in October 2016 doing research in the area of the Internet of Things (IoT). Prior to joining the IoT Lab, there had been significant work on on a smart doorbell project. More information on that here and here.
I was given a parallel project to make a simple and secure HVAC Controller, the core component of a thermostat. A traditional thermostat can be divided into 4 main subsystems:
- HVAC Controller: Circuitry to switch Heater, Fan, and AC on and off.
- Temperature Sensor
- Temperature Set Point: Usually a display with buttons to set the desired temperature.
- Thermostat: The logic that controls the HVAC controller to achieve the correct temperature.
The model for our IoT Thermostat is based off this, but with some key differences. 1) Each subsystem is separate, 2) The HVAC controller and temperature sensor are physical devices, but also have equivalent virtual devices represented by the API, and 3) The thermostat logic and temperature set point are strictly software components.
Why is this a better IoT Thermostat?
What makes this better than an existing smart thermostat like Nest’s or Honeywell’s?
Modularity
Having separate subcomponents that communicate over their REST APIs allows each to exist independently, and be changed and swapped out as needed. For example, I could buy a temperature sensor from company X with its own temperature API, an hvac controller from company Y with its own API for heating and cooling, and combine them over HTTP with my own thermostat API. Any of those APIs could even be connected to other APIs (Google calendar, Amazon Alexa, etc)
Privacy and Security
Our IoT Thermostat model promotes the idea of a Personal API. Instead of giving all of your data to a large company like Google, you keep your own data.
Cost
Keeping the temperature set point and thermostat logic virtual greatly simplify the physical hardware; only a simple HVAC controller and temperature sensor are needed. Our design has the potential to be much cheaper than any commercially available smart thermostat.
HVAC Controller
I was specifically tasked with creating the HVAC controller, its software, and its associated API. The purpose of this subsystem is to control the heater, fan, and ac in a home. If you look at typical thermostat wiring, there are 5 wires:
Red – 24 VAC
Black/Blue – Common (opposite phase 24 VAC)
White – Heater
Yellow – AC
Green – Fan
The heater, ac, and fan are powered on when their respective wires have a connection to the 24 VAC wire. You can simulate the role of a thermostat/hvac controller by, for example, connecting the heater wire to the red power wire to turn the heater on. The thermostat does this by using relays to switch the connections to the red wire on and off.
Hvac Hardware
I decided to build the hvac controller using the ESP8266 board because it is extremely inexpensive, WiFi capable, widely-used for IoT projects, and Arduino-compatible, making it fairly simple to program. One advantage of the solid state relays used in this project is that they are directly connected to the GPIO pins of the ESP board. Traditional relays often require additional circuitry because of the higher current requirements. Terminal blocks allow the thicker hvac wires to connect to the board. The power system currently being used is the power board for the doorbell project mentioned earlier, however, I swapped out a couple capacitors due to the 24 VAC transformer used in HVAC systems versus the 16 – 20ish VAC doorbell transformers. The design for the power supply will likely change in the future.
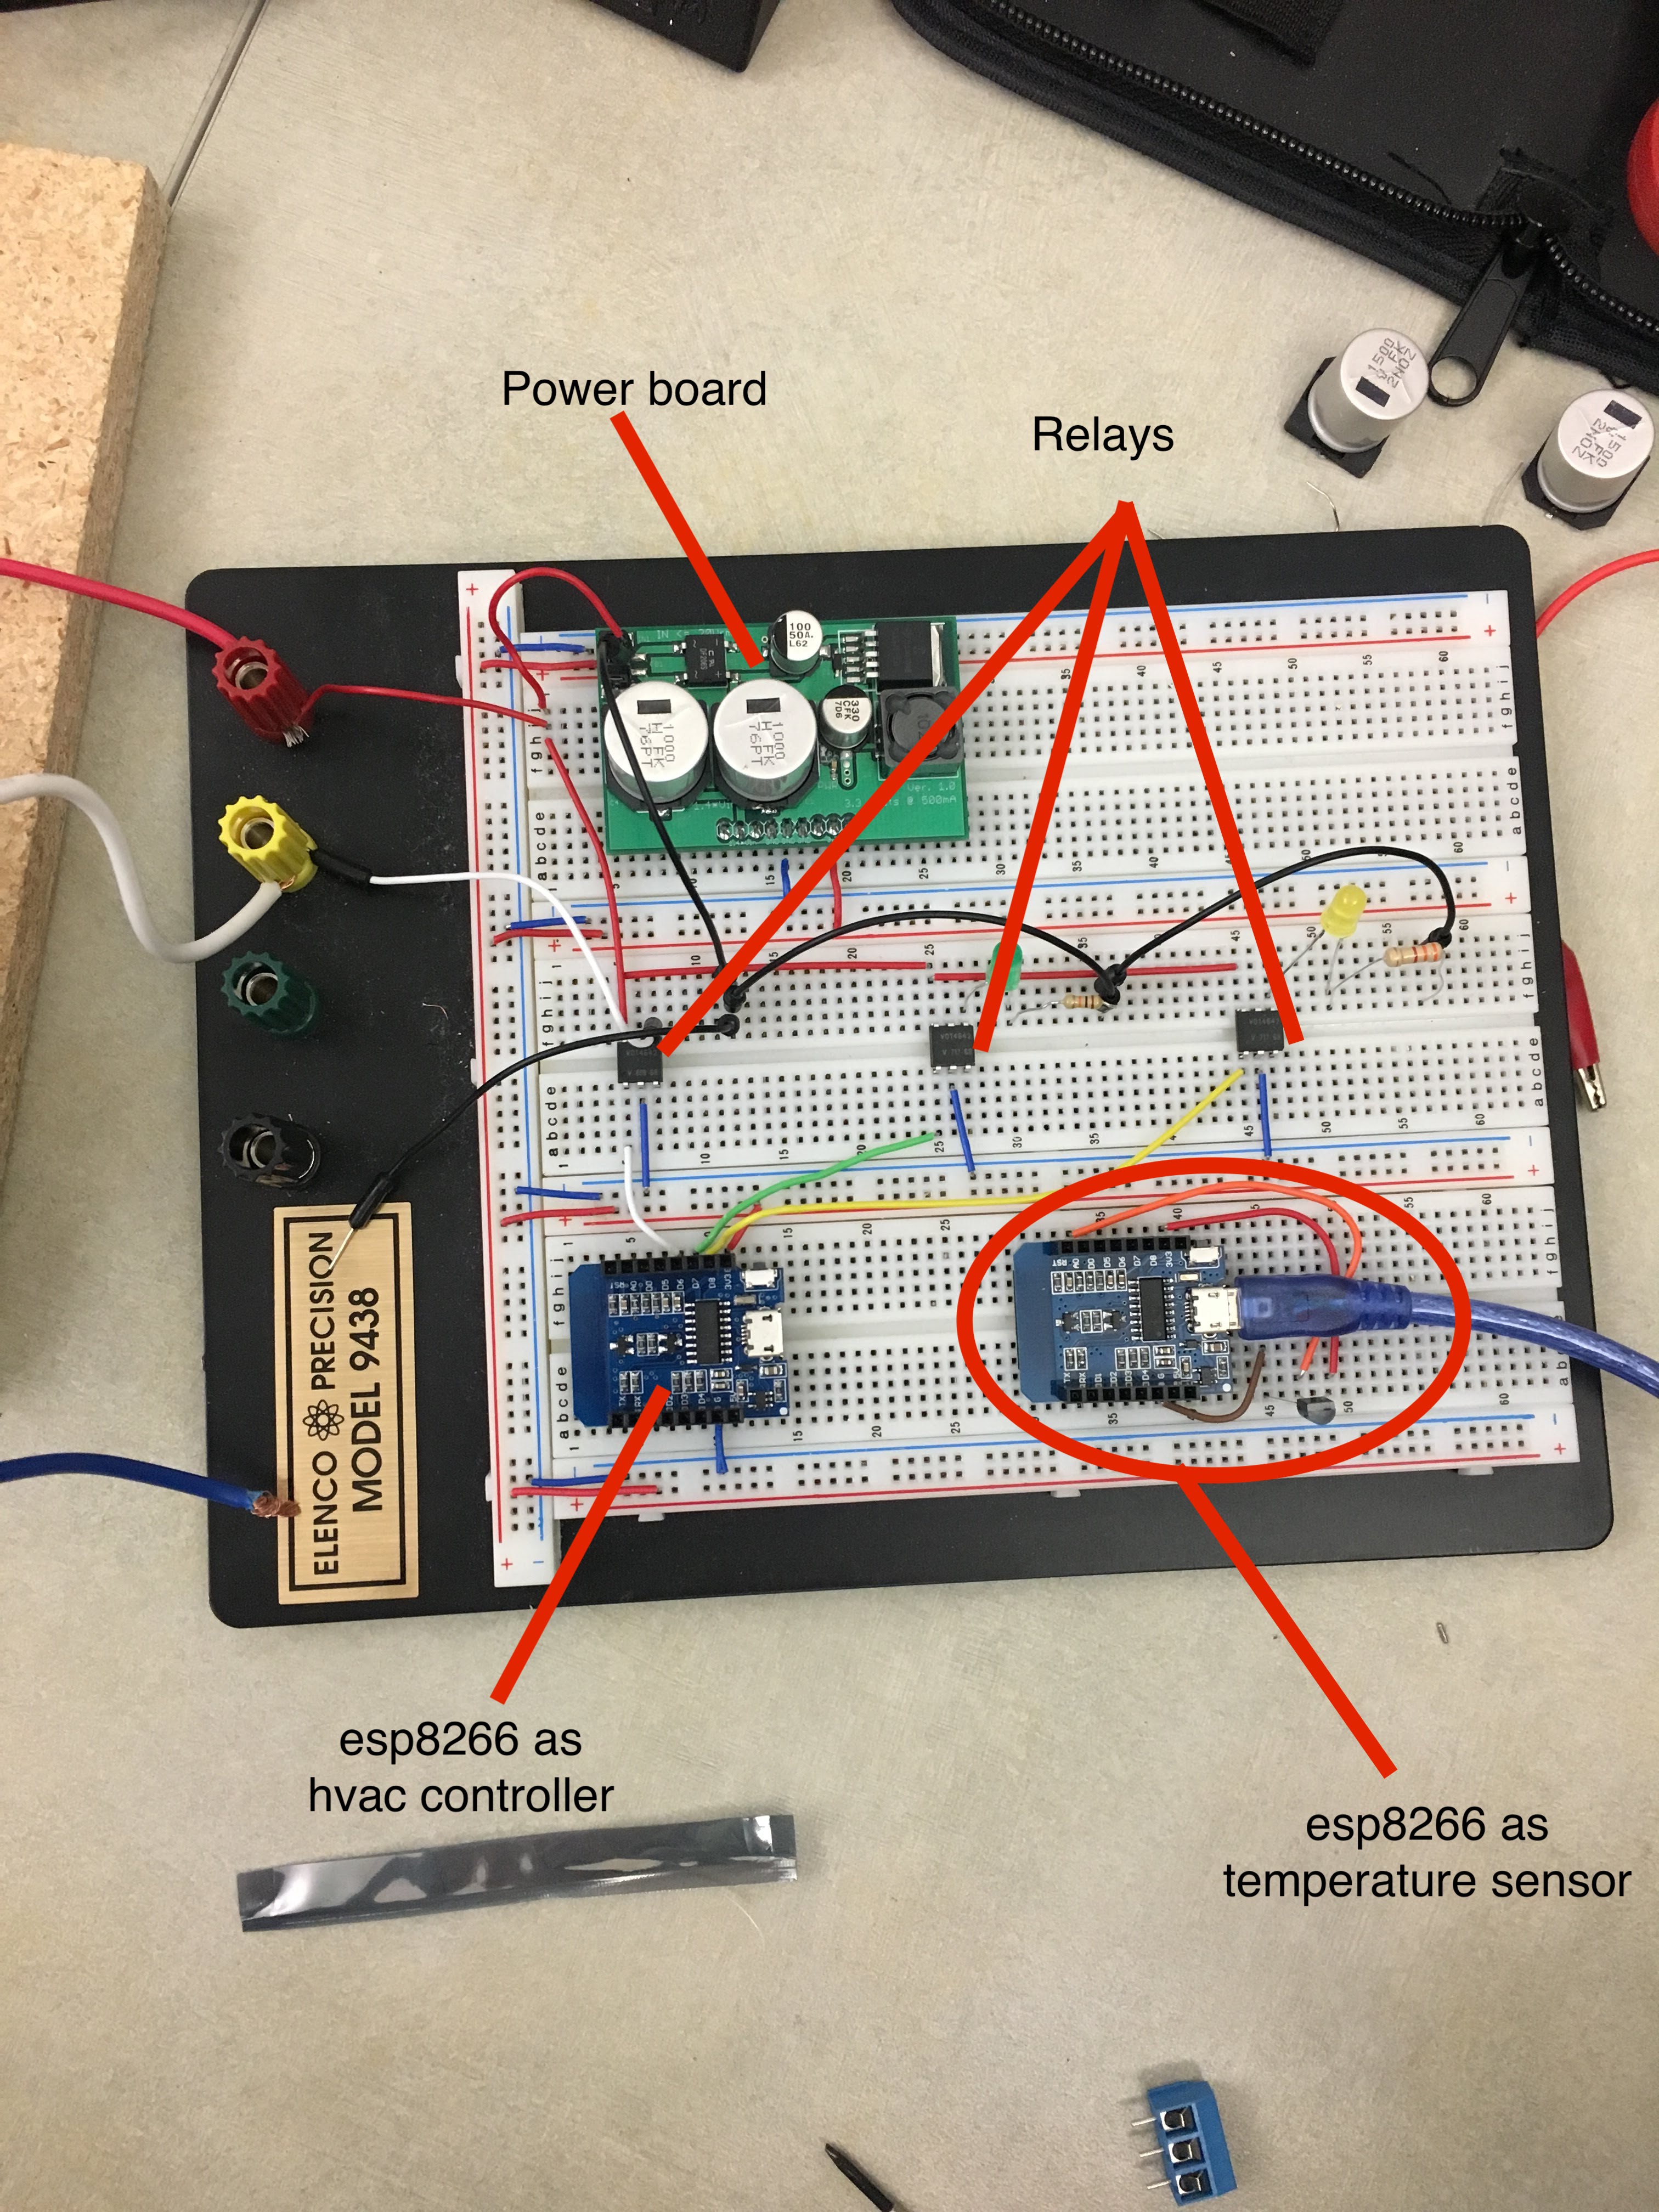
HVAC Controller Design on Breadboard
I will add a full schematic for the hardware at some point. Eventually, the esp + relays + power chip + terminal blocks will have a custom PCB fabricated, as well as a 3D printed housing.
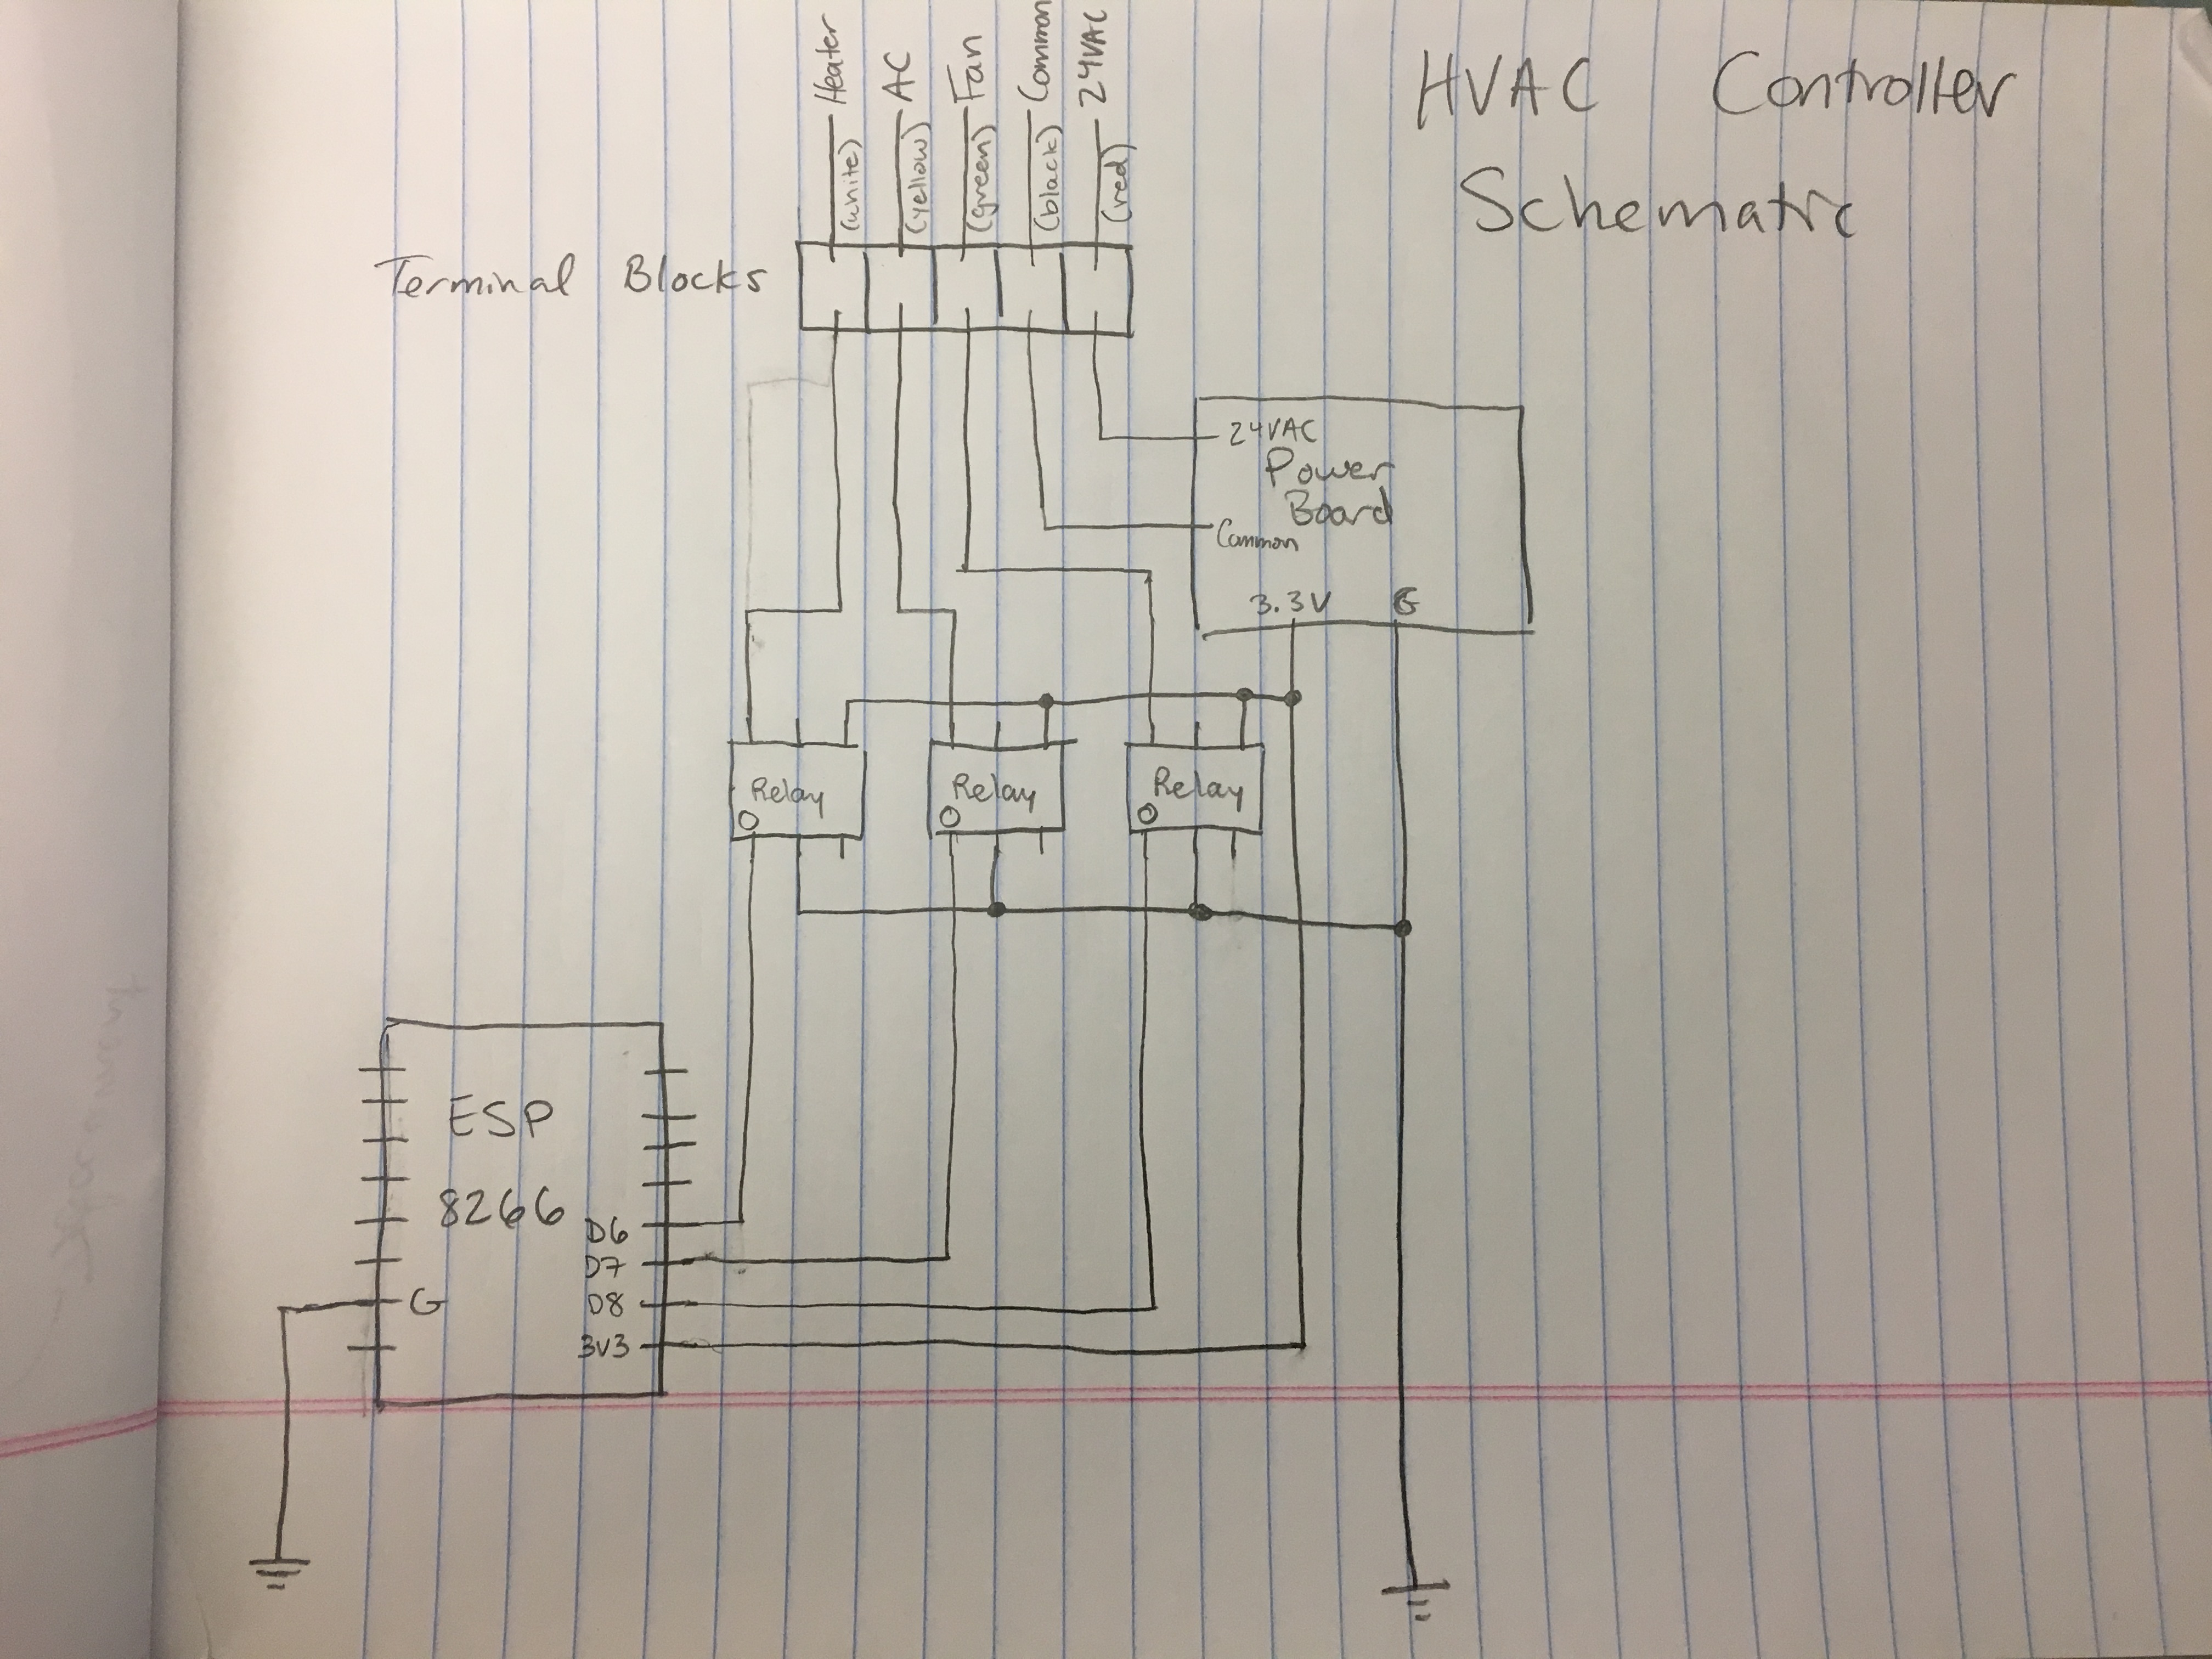
Schematic of HVAC controller (hand drawn)
Test Hardware
In order to test the design, Dr. Flanagan recommended that I create test hardware to integrate with the hvac design. This is because it isn’t practical to bring a full heating system into the office. To represent a heater, I created a test rig with a heater transformer, a heater contactor, and a light bulb fixture to represent the heater itself.
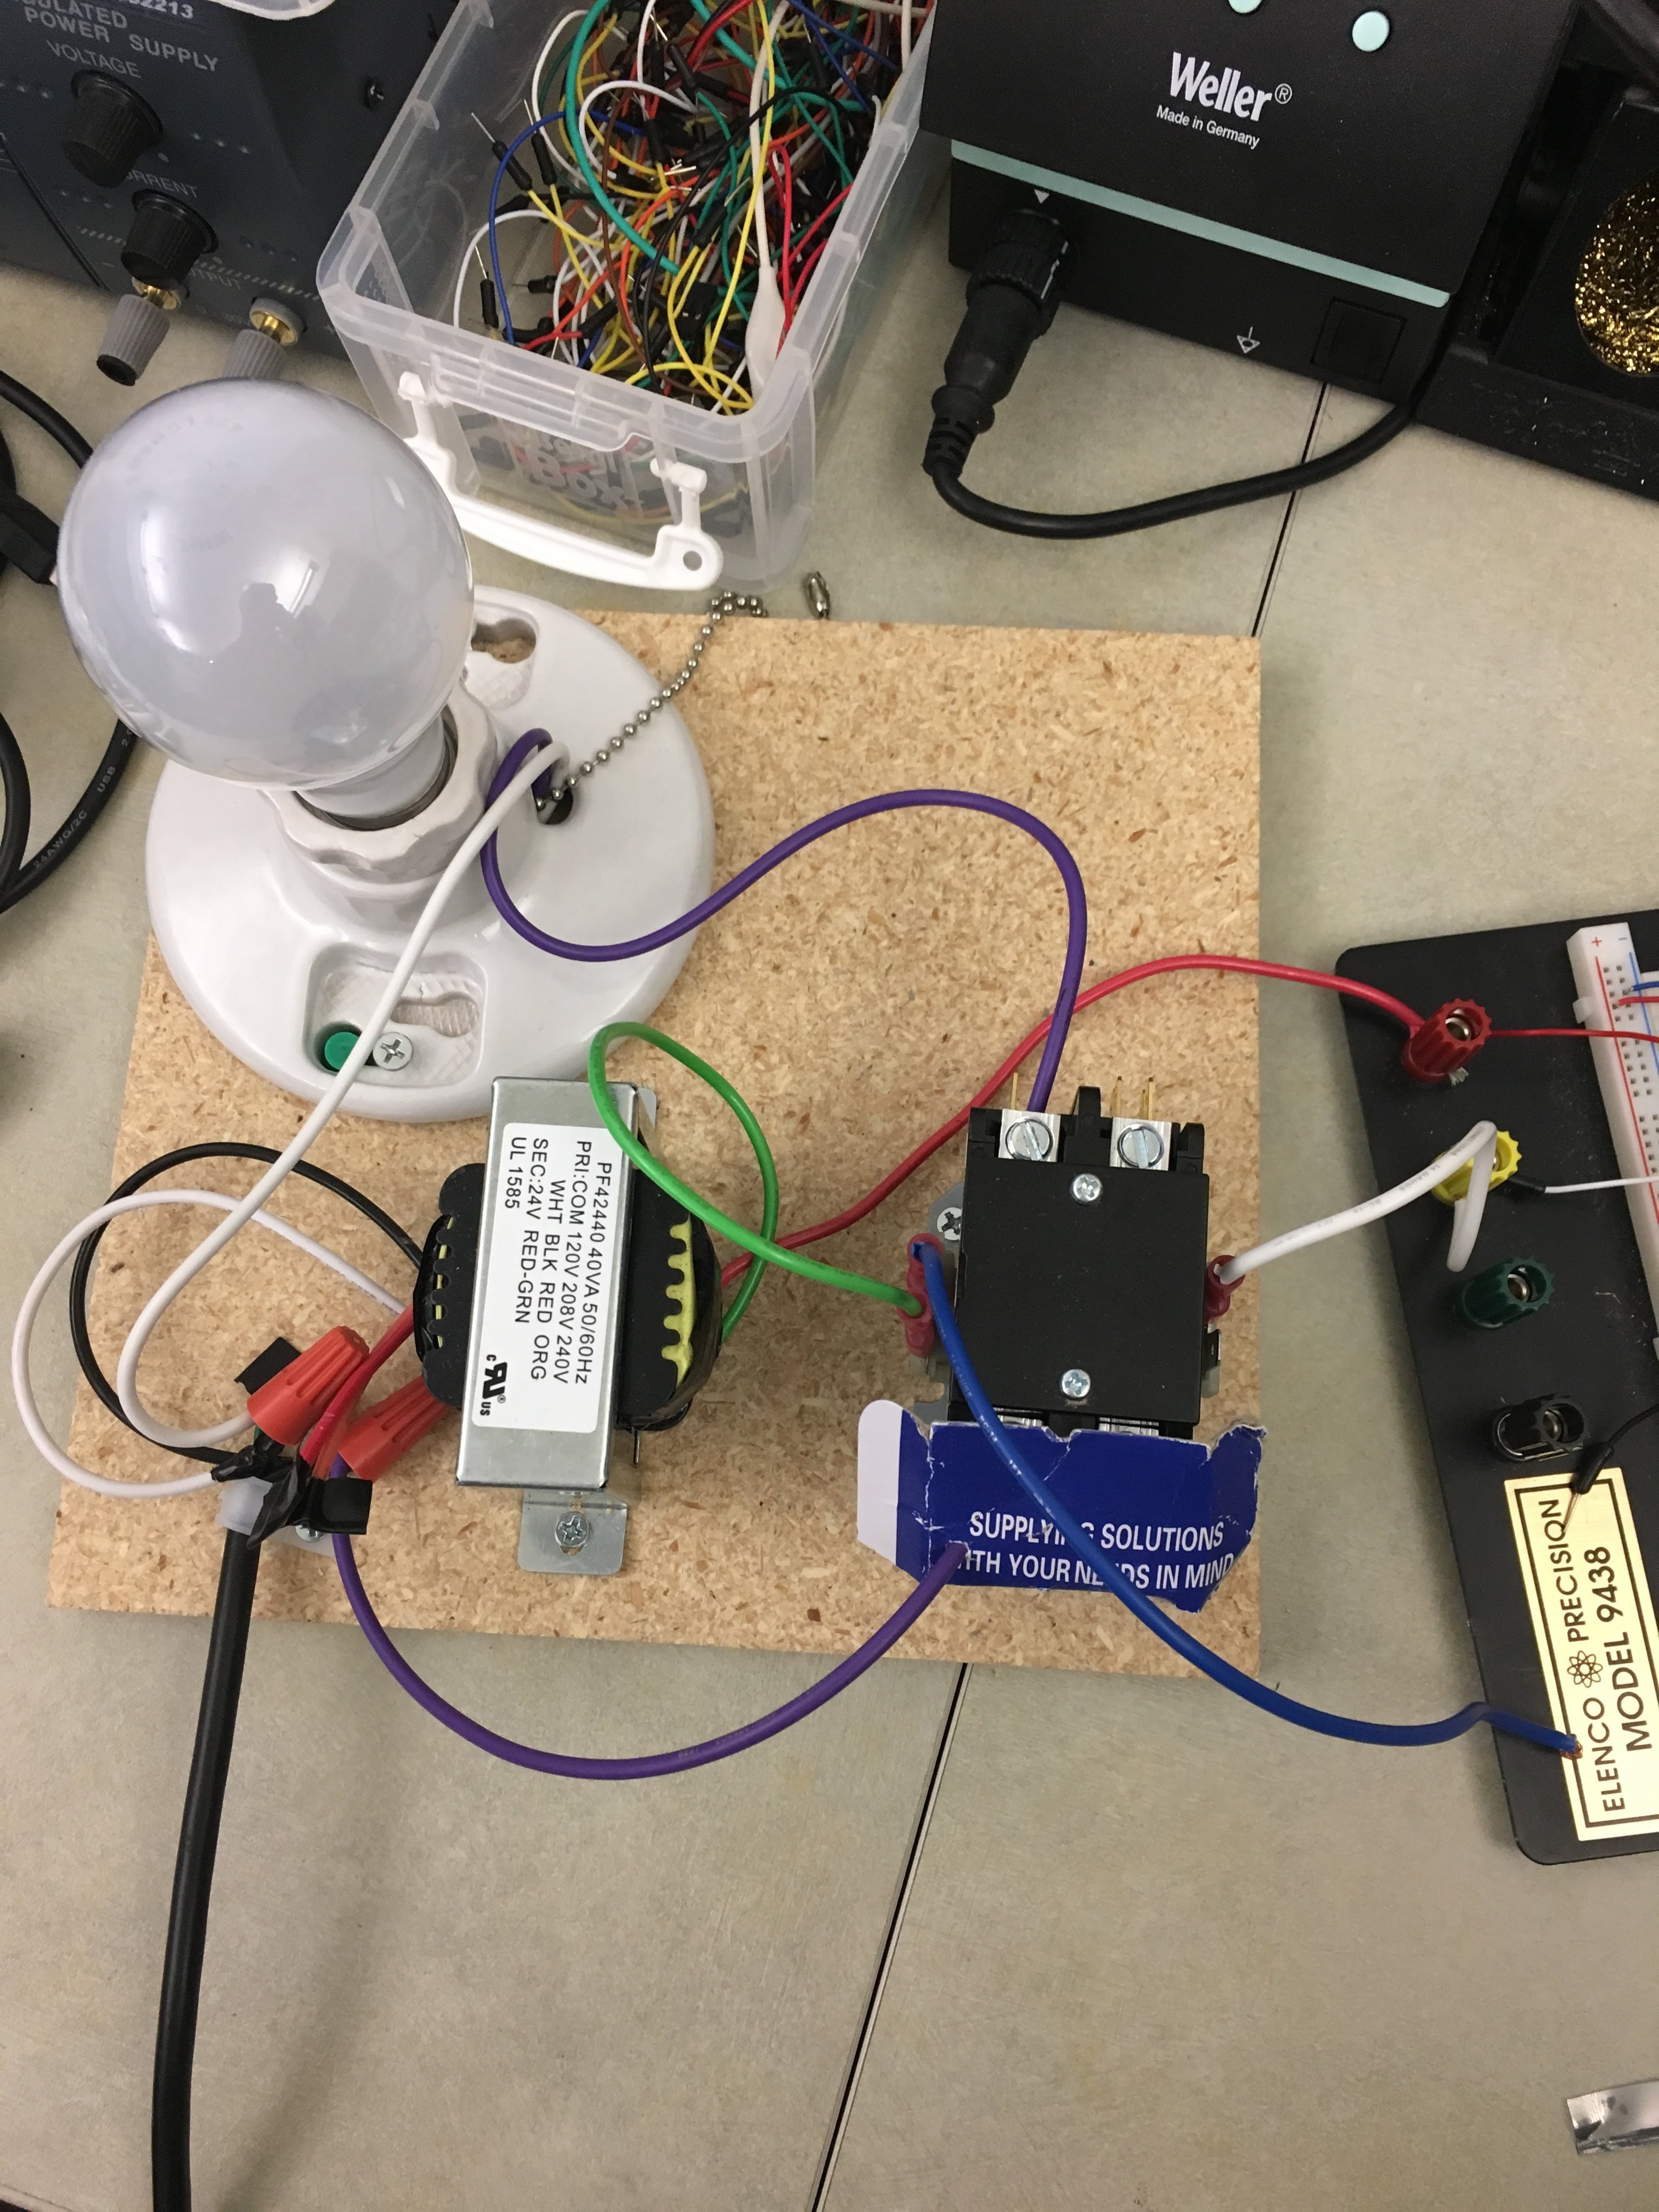
Test Rig for Representing Heater
Future posts will detail the hvac software I wrote for the esp8266, the hvac web api I created using AWS, as well as other parts of the full thermostat system.
0 Comments